Whitehorse24 (talk | contribs) No edit summary |
Whitehorse24 (talk | contribs) No edit summary |
||
| Line 28: | Line 28: | ||
:''Main article: [[The Adventure of the Runaway Room]]'' |
:''Main article: [[The Adventure of the Runaway Room]]'' |
||
[[File:Crogley_and_Megundal.png|thumb|left|Making a deal with Megundal]] |
[[File:Crogley_and_Megundal.png|thumb|left|Making a deal with Megundal]] |
||
| − | About a decade later, Crogley had made a deal with [[Cosney Megundal]] to steal top secret information from the government. Crogley, being in charge of the telegraph stations, had easy access to this information. In order to hide this information, Crogley visited his father, [[Mortar Milverton]], and asked him to embed the information into two separate music disks telling him music was on it. Then, Megundal made the first transaction with Crogley and obtained the first music disk. Crogley visited his father once he had the money and planned to split the money for his father's help. Milverton, unsure of his son, agreed to take the money in exchange for selling the second music disk. But Megundal murdered Milverton in a fit of rage after the latter attempted to sell the disk at a higher price. In an act of revenge, and to retrieve the music disk, Crogley used his money to hire many people, including a fake bailiff, to lure Megundal into the omnibus his father was killed in and set it ablaze, burning him alive. |
+ | About a decade later, Crogley had made a deal with [[Cosney Megundal]] to steal top secret information from the government. Crogley, being in charge of the telegraph stations, had easy access to this information. He gained a secret telegram that said: K. Asōgi, A. Sasha, T. Gregson, J. Watson, and THE ABOVE FOUR. In order to hide this information, Crogley visited his father, [[Mortar Milverton]], and asked him to embed the information into two separate music disks telling him music was on it. Then, Megundal made the first transaction with Crogley and obtained the first music disk. Crogley visited his father once he had the money and planned to split the money for his father's help. Milverton, unsure of his son, agreed to take the money in exchange for selling the second music disk. But Megundal murdered Milverton in a fit of rage after the latter attempted to sell the disk at a higher price. In an act of revenge, and to retrieve the music disk, Crogley used his money to hire many people, including a fake bailiff, to lure Megundal into the omnibus his father was killed in and set it ablaze, burning him alive. |
== Retrieving the music disks == |
== Retrieving the music disks == |
||
| Line 34: | Line 34: | ||
Robert Crogley visited [[Hatch's Pawn Shop]], under the alias ''Egg Benedict''. He claimed that [[Gina Lestrade]] had stolen his proof of reservation for Megundal's coat. [[Sherlock Holmes]] and [[Ryūnosuke Naruhodō]] deduced his true intentions, to intercept the stolen music disk inside the coat's pocket, and in a fit of anger, he attempted to take the coat at gun point. He was forced to retreat from the shop after the arrival of [[Tobias Gregson|Inspector Gregson]]. |
Robert Crogley visited [[Hatch's Pawn Shop]], under the alias ''Egg Benedict''. He claimed that [[Gina Lestrade]] had stolen his proof of reservation for Megundal's coat. [[Sherlock Holmes]] and [[Ryūnosuke Naruhodō]] deduced his true intentions, to intercept the stolen music disk inside the coat's pocket, and in a fit of anger, he attempted to take the coat at gun point. He was forced to retreat from the shop after the arrival of [[Tobias Gregson|Inspector Gregson]]. |
||
| − | That night Crogley called his old friends, the Tinpillar brothers, to help him retrieve the discs. When they arrived, Crogley starts by looking on the shelves towards the front of the shop, and the brothers go towards the back. Crogley very quickly finds the music box, and takes out the disc sitting inside. Hatch hears the intruders, and goes out to confront them, taking his gun and telling |
+ | That night Crogley called his old friends, the Tinpillar brothers, to help him retrieve the discs. When they arrived, Crogley starts by looking on the shelves towards the front of the shop, and the brothers go towards the back. Crogley very quickly finds the music box, and takes out the disc sitting inside. Hatch hears the intruders, and goes out to confront them, taking his gun and telling Lestrade to stay in the back room. He meets the brothers first, and they have a scuffle at the back. He beats them up surprisingly well, and upon noticing Crogley shoots him. The bullet goes through his left arm and into the wall calendar at the back. Crogley panics, and shoots his own gun at Hatch, who had been retreating into the back room. Despite meaning it only as a warning shot, his aim was uncanny and it hit Hatch's heart killing him on the spot. Upon realizing that he panicked and ran from the scene, leaving the Timplers to deal without him. |
== Lestrade's Trial == |
== Lestrade's Trial == |
||
| − | Gina Lestrade was arrested for the murder of Hatch Windibank. |
+ | Gina Lestrade was arrested for the murder of Hatch Windibank. Naruhodō mentions Crogley from a photograph when suggesting the real killer. Upon looking at the photo [[Jury|Juror No. 5]] reveals Crogley as a technician in the same communication office she works at. When he was at the witness stand, he still has the first disc on him, the second has already been presented as evidence in the trial by [[Barok van Zieks]] despite Tobias Gregson’s pleas. At a point during Lestrade’s testimony, Gregson and Crogley talk quietly despite still being on the stand with her. They do a trade: Gregson tells Crogley about the small window at the scene of the crime to help with his alibi, if Crogley gives Gregson the missing disc. They manage to complete the trade despite Naruhodō noticing something is up. |
| − | Later in the trial, while Crogley is testifying with Gregson and the Tinpillars on the stand as well, Gregson has a sudden outburst and grabs Nemmy by the collar. What Naruhodō later figures out is that Gregson was trying to hide the disc inside Nemmy’s suit pocket in the off chance that he would be searched for it. However, Naruhodō saw through it, and the second was found. Despite this, neither Crogley or Gregson would admit to the trade. |
+ | Later in the trial, while Crogley is testifying with Gregson and the Tinpillars on the stand as well, Gregson has a sudden outburst and grabs Nemmy by the collar. What Naruhodō later figures out is that Gregson was trying to hide the disc inside Nemmy’s suit pocket in the off chance that he would be searched for it. However, Naruhodō saw through it, and the second disc was found. Despite this, neither Crogley or Gregson would admit to the trade. |
[[File:Crogley_broken_down.png|thumb|Robert Crogley defeated]] |
[[File:Crogley_broken_down.png|thumb|Robert Crogley defeated]] |
||
| − | The final nail in the coffin was Naruhodō threatening to put the two discs into the music box and play the secrets in front of everyone in the courtroom, saying that if Gregson didn’t bother choosing his methods on the job, then neither would he. Van Zieks, surprisingly, agreed |
+ | The final nail in the coffin was Naruhodō threatening to put the two discs into the music box and play the secrets in front of everyone in the courtroom, saying that if Gregson didn’t bother choosing his methods on the job, then neither would he. Van Zieks, surprisingly, agreed and they played them. That's when Tobias Gregson gave in and admitted his crimes. [[Breakdown|After strangling him, Robert Crogley followed suit]]. |
In jail, Crogley decided that he had no regrets about taking the path that he did, but Nemmy and Tully Tinpillar tell him to take it easy and that they should bring back their milk business. [[The Resolve of Naruhodō Ryūnosuke|Later]] it was revealed that ''Japanese'' Morse code on the discs was actually an assassination exchange program sent from British Chief Justice [[Hart Vortex]] to Japanese Minister of Foreign Affairs [[Seishirou Jigoku]]. Four names on it meant that Japanese [[Kazuma Asōgi]] would go to England to kill Tobias Gregson and British Ann Sasha (under the pseudonym [[Jezail Brett]]) would go to Japan to kill [[John Watson]]. |
In jail, Crogley decided that he had no regrets about taking the path that he did, but Nemmy and Tully Tinpillar tell him to take it easy and that they should bring back their milk business. [[The Resolve of Naruhodō Ryūnosuke|Later]] it was revealed that ''Japanese'' Morse code on the discs was actually an assassination exchange program sent from British Chief Justice [[Hart Vortex]] to Japanese Minister of Foreign Affairs [[Seishirou Jigoku]]. Four names on it meant that Japanese [[Kazuma Asōgi]] would go to England to kill Tobias Gregson and British Ann Sasha (under the pseudonym [[Jezail Brett]]) would go to Japan to kill [[John Watson]]. |
||
Revision as of 02:31, 14 January 2018
| This article contains information about Ace Attorney media that has been released only in Japan. | |
|---|---|
 The information in this article comes from a game, demo, or other media that has been released in Japan, but not in any predominantly English-speaking country. The subject of this article has not been officially revealed for English versions of this media. English versions of this content are only available through unofficial translations. More information on this can be found here. If you have personal experience with the item of media in question, you can help the Ace Attorney Wiki by improving on this article. Please heed the manual of style when adding information. | |
- For other individuals called Robert, please see Robert (disambiguation).
| Robert Crogley |
Image Gallery |
Robert Crogley was a telegraph station technician in charge of the London city area. He was responsible for the murders of Cosney Megundal and Hatch Windibank. He presented himself as a high-handed British gentleman, dressed in gaudy white, with a penchant for twirling and posing oddly.
Robert Crogley's former surname was “Milverton”, and he was the son of "Thrice-fired" Mortar Milverton. He was born into poverty and used to be childhood friends with the Tinpillar brothers. He hoped to start a milk business with them one day when he was freed from jail.
Earlier life
Robert Milverton lived in a poor area in London, his only friends were Nemmy Tinpillar and Tully Tinpillar. His father was Thrice-Fired Mortar, the bricklayer. He and his wife were very poor and they almost never went without worrying about money. Robert couldn't take this, so he studied as hard as he could, changed his last name to Crogley and got a job at a telegram company.
His father's death
- Main article: The Adventure of the Runaway Room
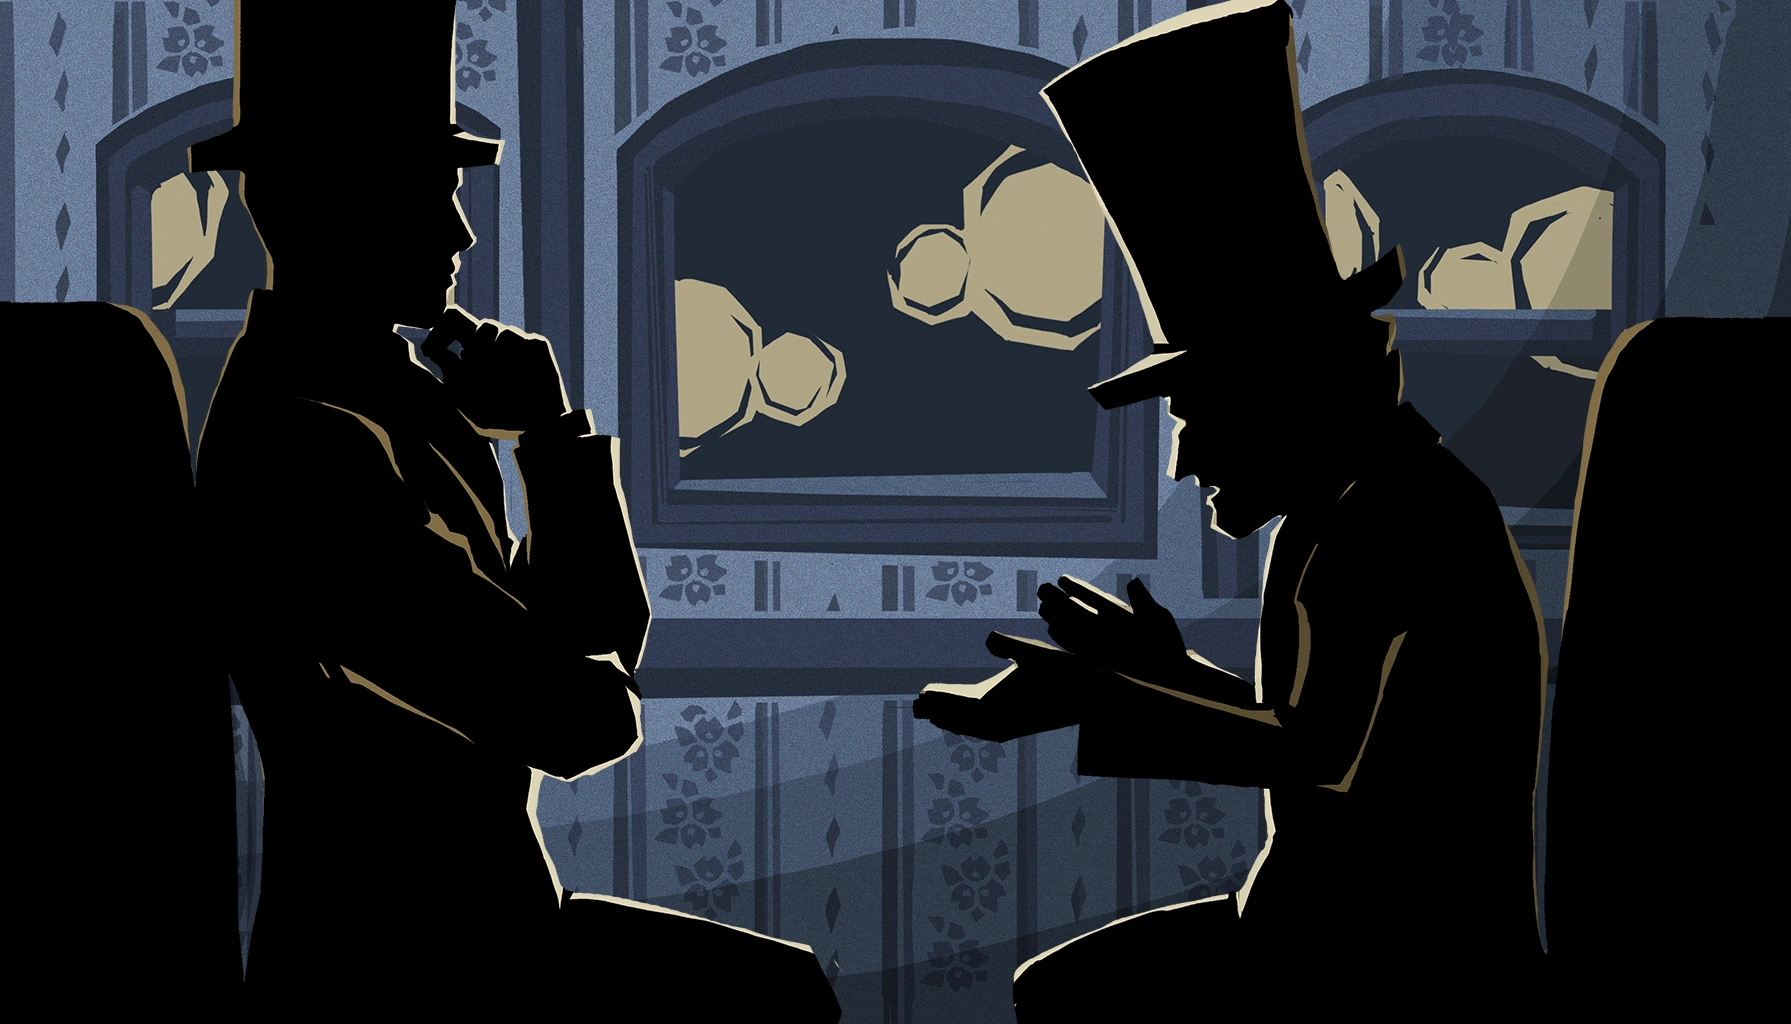
Making a deal with Megundal
About a decade later, Crogley had made a deal with Cosney Megundal to steal top secret information from the government. Crogley, being in charge of the telegraph stations, had easy access to this information. He gained a secret telegram that said: K. Asōgi, A. Sasha, T. Gregson, J. Watson, and THE ABOVE FOUR. In order to hide this information, Crogley visited his father, Mortar Milverton, and asked him to embed the information into two separate music disks telling him music was on it. Then, Megundal made the first transaction with Crogley and obtained the first music disk. Crogley visited his father once he had the money and planned to split the money for his father's help. Milverton, unsure of his son, agreed to take the money in exchange for selling the second music disk. But Megundal murdered Milverton in a fit of rage after the latter attempted to sell the disk at a higher price. In an act of revenge, and to retrieve the music disk, Crogley used his money to hire many people, including a fake bailiff, to lure Megundal into the omnibus his father was killed in and set it ablaze, burning him alive.
Retrieving the music disks
- Main article: The Adventure of the Unspeakable Story
Robert Crogley visited Hatch's Pawn Shop, under the alias Egg Benedict. He claimed that Gina Lestrade had stolen his proof of reservation for Megundal's coat. Sherlock Holmes and Ryūnosuke Naruhodō deduced his true intentions, to intercept the stolen music disk inside the coat's pocket, and in a fit of anger, he attempted to take the coat at gun point. He was forced to retreat from the shop after the arrival of Inspector Gregson.
That night Crogley called his old friends, the Tinpillar brothers, to help him retrieve the discs. When they arrived, Crogley starts by looking on the shelves towards the front of the shop, and the brothers go towards the back. Crogley very quickly finds the music box, and takes out the disc sitting inside. Hatch hears the intruders, and goes out to confront them, taking his gun and telling Lestrade to stay in the back room. He meets the brothers first, and they have a scuffle at the back. He beats them up surprisingly well, and upon noticing Crogley shoots him. The bullet goes through his left arm and into the wall calendar at the back. Crogley panics, and shoots his own gun at Hatch, who had been retreating into the back room. Despite meaning it only as a warning shot, his aim was uncanny and it hit Hatch's heart killing him on the spot. Upon realizing that he panicked and ran from the scene, leaving the Timplers to deal without him.
Lestrade's Trial
Gina Lestrade was arrested for the murder of Hatch Windibank. Naruhodō mentions Crogley from a photograph when suggesting the real killer. Upon looking at the photo Juror No. 5 reveals Crogley as a technician in the same communication office she works at. When he was at the witness stand, he still has the first disc on him, the second has already been presented as evidence in the trial by Barok van Zieks despite Tobias Gregson’s pleas. At a point during Lestrade’s testimony, Gregson and Crogley talk quietly despite still being on the stand with her. They do a trade: Gregson tells Crogley about the small window at the scene of the crime to help with his alibi, if Crogley gives Gregson the missing disc. They manage to complete the trade despite Naruhodō noticing something is up.
Later in the trial, while Crogley is testifying with Gregson and the Tinpillars on the stand as well, Gregson has a sudden outburst and grabs Nemmy by the collar. What Naruhodō later figures out is that Gregson was trying to hide the disc inside Nemmy’s suit pocket in the off chance that he would be searched for it. However, Naruhodō saw through it, and the second disc was found. Despite this, neither Crogley or Gregson would admit to the trade.
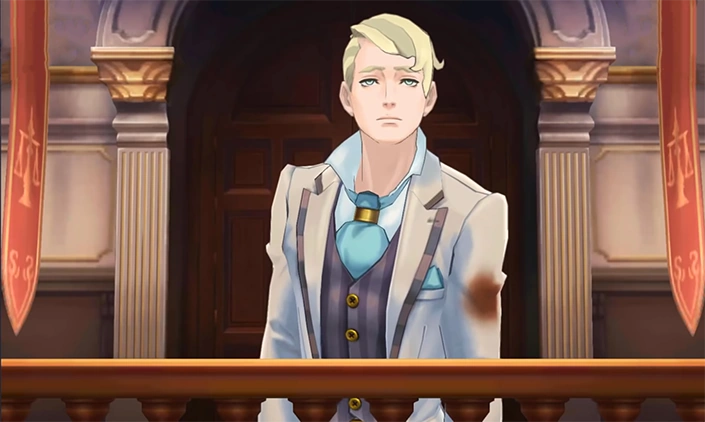
Robert Crogley defeated
The final nail in the coffin was Naruhodō threatening to put the two discs into the music box and play the secrets in front of everyone in the courtroom, saying that if Gregson didn’t bother choosing his methods on the job, then neither would he. Van Zieks, surprisingly, agreed and they played them. That's when Tobias Gregson gave in and admitted his crimes. After strangling him, Robert Crogley followed suit.
In jail, Crogley decided that he had no regrets about taking the path that he did, but Nemmy and Tully Tinpillar tell him to take it easy and that they should bring back their milk business. Later it was revealed that Japanese Morse code on the discs was actually an assassination exchange program sent from British Chief Justice Hart Vortex to Japanese Minister of Foreign Affairs Seishirou Jigoku. Four names on it meant that Japanese Kazuma Asōgi would go to England to kill Tobias Gregson and British Ann Sasha (under the pseudonym Jezail Brett) would go to Japan to kill John Watson.
Name
- "Crogley" is a pun on "Kuro-Grey" (Black-Grey).
- His alias name "Egg Benedict" comes from a name of a food of the same name.
Trivia
- Robert Crogley has the distinction of being one of the first criminals convicted of murder who appears in the end game credit sequence. (Though Viola Cadaverini appears in the closing credits of Phoenix Wright: Ace Attorney: Trials and Tribulations, Furio Tigre does not, for example)
- His belt buckle, a horse shoe, and his overall pale appearance and white clothes, could be a reference to the dairy he wishes to open that he mentions during the end credits.
- His appearance and that of his two friends could also be a nod to the portrayal of Moriarty in the Sherlock Hound television series, though Robert seems to be much less of a criminal mastermind like Moriarty and shows a great deal of remorse for his actions.
- Crogley technically helped Hart Vortex bring the Death Bringer curse to Barok van Zieks due to killing Megundal right after he got acquitted. However, Crogley wasn't working for Vortex.